Podcast (marketing-podcast): Play in new window | Download | Embed
Considering updating your social media platforms and need some professional advice on how to go about it? What are some top design tips that you can use when you work on your designs? What are some principles you can follow to maintain an impactful brand?
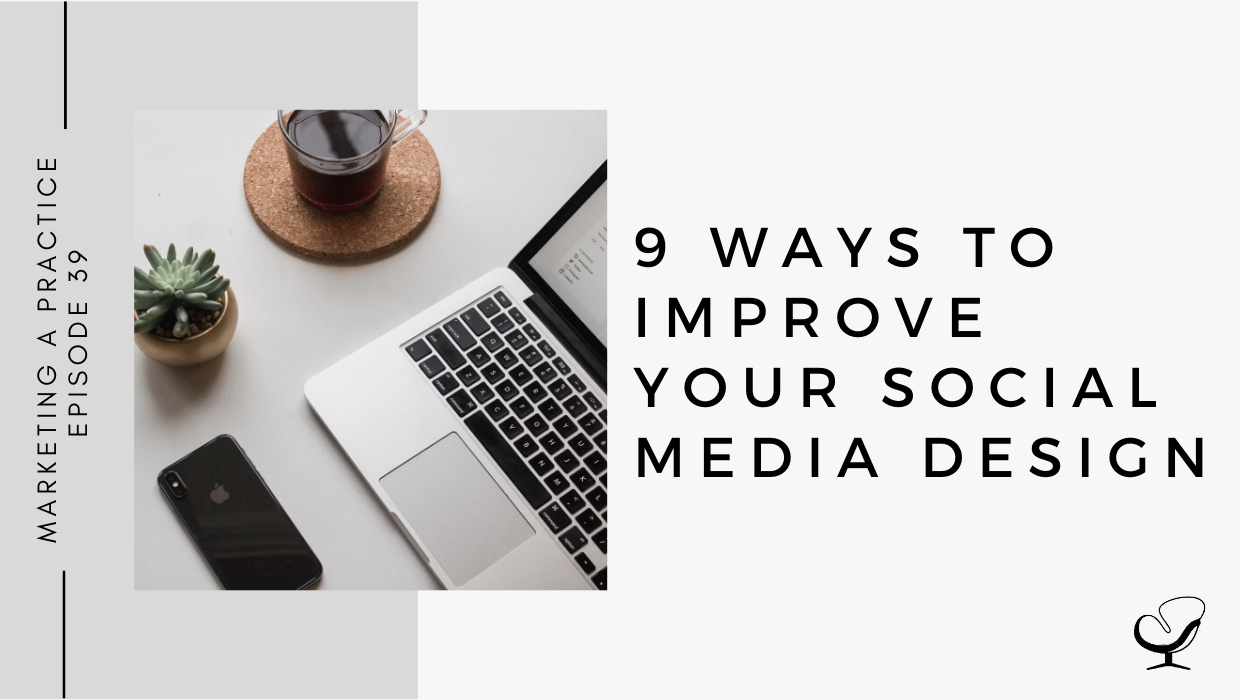
In this podcast episode, Sam Carvalho speaks about 9 ways to improve your social media design and she shares some designer tips you can implement today.
In This Podcast
Summary
- Showcase your branding, product, and your services and your community
- Use the correct image sizes for each social media platform
- Create your designs in RGB color mode
- Make sure your designs are visually consistent
- Devote more space to images than text
- Pay attention to how the profile picture interacts with the cover photo
- Make sure your designs abide by each platform’s rules
- Keep the design simple
- Make sure your design is creative and visually engaging
1. Showcase your branding, product, and your services and your community
It is recommended to display your logo in your profile picture, instead of a personal photo. If you place a photo of yourself as the profile picture on your company’s Facebook page or other social media platforms, it can confuse potential clients as to whether this profile is your personal one or your company’s.
Designer tip
Place your logo in your profile picture (JPG or PNG) as a square on a white background to make sure that it does not get cut off. Having this white space around your logo also looks more professional and aids readability.
When thinking about your cover page, you can use your cover page for other interesting information, or to showcase a current campaign you are running, and so forth. If you display your company’s services or products, be sure to also put down your company’s contact details.
Designer tip
Change your cover photo often to keep your social media fresh and interesting for your audience. Make sure that the new design is consistent with your brand.
2. Use the correct image sizes for each social media platform
- Facebook: 852 x 315 pixels for cover picture and 180 x 180 pixels for the profile image. There are two sizes of cover pictures for mobile and desktop, but be sure to keep the pixel amount for mobile to make sure that any information in your cover picture is not cut off.
- Google Plus: 2120 x 1192 pixels for the cover photo, 800 x 800 pixels for the profile picture.
- Youtube: 2560 x 1440 for the cover photo, 800 x 800 for the channel icon
- Twitter: 1252 x 626 pixels for cover, 73 x 73 for the profile image, and 1600 x 1200 for the background image.
- LinkedIn: 646 x 220 pixels for the banner image, 100 x 60 pixels for profile image.
- Instagram: 1080 x 1080 pixels for post and 1080 x 1920 pixels for a story.
Canva is a good tool to use for templates that already have the correct dimensions and image sizes if you prefer not to do custom.
3. Create your design in RBG color mode
RGB is for digital and CMYK is for print design.
For social media, because it is a digital platform, use RBG color for screen image displays.
4. Make sure your designs are visually consistent
Consistency in branding and social media designs is what will help to establish your brand name amongst your audience. You can use consistent social media to establish a strong brand identity, so make sure all your designs are cohesive across all platforms that you use.
Designer tip
Create your own templates for different kinds of posts so that you can go back to them and insert new content for each new post, making sure that they follow a consistent design.
5. Devote more space to images than text
It’s been proven that image-based content, especially photos of people, is proven to generate more retweets, Facebook shares and other types of engagement than text alone.
The rule of thumb is for the image not to consist of more than 20% text, therefore making sure that there is enough white space around your text and not crowding it in the post.
Designer tip: for every 5 posts that you post
- 3 should be value-added (such as inspirational quotes, tips, and advice)
- 1 should be promotional (new upcoming campaigns, services, and products)
- 1 should be personal (about yourself, an activity you have been doing recently, etc)
6. Pay attention to how the placement of the profile picture interacts with the cover photo
In terms of composition, don’t let a profile picture overlapping your cover image hide any valuable content.
Designer tip
Place any information that is in your cover photo towards the righthand side to avoid it clashing or being covered by the profile picture.
7. Make sure your designs abide by each platform’s rules
This is important when it comes to paid ads, that you are within a platform’s guidelines and regulations. Again, make sure not to use more than 20% text in your posts.
Be sure not to use any copyrighted images in your posts. To find high quality and interesting art for your posts, try Unsplash or Pexels for ideas and resources.
8. Keep the design simple
Use compelling images, short texts, and a simple call to action where relevant. Less is more, especially in social media design. If you need to use more text, make use of the description boxes below your posts to add in more information instead of crowding your posts.
9. Make sure your design is creative and visually engaging
Have fun with your design and keep in mind that the bottom line is that your social media’s purpose is to engage with your audience and encourage them to engage with your brand.
Designer tip
This is preference-based, but you can also include a small version of your logo in each of your posts so that when people share them, their audience will find their way back to you due to your logo being within the post itself.
Useful Links:
- LaToya Smith on Why You Should Tell More Stories | MP 38
- Email Sam at [email protected]
- Design Services With Sam
- Apply to work with us
Meet Sam Carvalho
 Sam Carvalho is a graphic designer living in Cape Town, South Africa, with over five years of experience in both design and marketing, with a special interest and experience in the start-up environment.
She has been working with Practice of the Practice since 2016 and has helped over 70 therapist entrepreneurs take their practices to the next level by enhancing their visual branding. She loves working with a variety of clients on design-intensive tasks and is always up for a challenge!
Follow Sam on Instagram to see some of her work. To work with Sam, head on over to www.practiceofthepractice.com/branding.
Thanks For Listening!
Feel free to leave a comment below or share this podcast on social media by clicking on one of the social media links below! Alternatively, leave a review on iTunes and subscribe!
Podcast Transcription
[SAM]:
Marketing a Practice podcast is part of the Practice of the Practice Podcast Network, a network of podcasts seeking to help you market and grow your business and yourself. To hear other podcasts like Beta Male Revolution, Empowered and Unapologetic, Imperfect Thriving, or Faith in Practice, go to practiceofthepractice.com/network.
Welcome to the Marketing a Practice podcast with me, Sam Carvalho, where you will discover everything you need to know about marketing and branding your business. To find out more about how I can help you brand your business, visit www.practiceofthepractice.com/branding. And if you’d like to see some examples of my design work, be sure to follow me on Instagram @samanthacarvalhodesign.
Hi there. Thanks so much for joining me today on the Marketing a Practice podcast. I’m so happy to have you with me, and I hope that you’re having a great day. Today, I thought we could talk about social media design. So, these days, every company has a social media page. It’s pretty much become as mandatory as a website, and what Joe Sanok always recommends from Practice of the Practice is sticking to social media platforms that you’re comfortable with and that you already enjoy. So, if you find yourself browsing through Instagram often, then starting off with an Instagram business page, and once you’ve kind of mastered that, you can then move on to Facebook or Twitter or some of the other social media platforms. But really, although some people may recommend being on as many platforms as possible, we always usually recommend sticking to the one that you enjoy, and rather perfecting one and having a great presence on one, than spreading yourself too thin and not really being effective on any of the bad ones. So that’s just a quick tip when it comes to marketing yourself on social media in general. But I thought I’d also dive into the specifics of design for social media, so when it comes to designing your posts, but also creating stand out cover images, and what’s kind of best practice when it comes to design for your profile images, and things like that. So, essentially, the profile picture, cover image, and background images on the social media platforms act as a billboard space for companies to communicate to their brand. That’s a nice way to look at it. If you think of a billboard on the side of the road, what would you do with that space? It’s essentially a digital billboard, so you can kind of view it in the same way. So, I’ve put together nine tips on how to create eye catching designs for your social media.
Tip number one is to showcase your branding, products and/or services, and community. So, most social media pages consist of a cover image and profile picture, and best practice is to have your company logo displayed in your profile picture. So I know, a lot of times, counselors will choose to use a photo of themselves, and while that’s fine, because I get that the company does kind of center around you, it can confuse customers with your personal Facebook profile, because obviously people usually have themselves or photo of them as their profile image on their personal pages, and you really want to differentiate from that when it comes to your company’s Facebook page. So it’s best practice, as I said, to have your logo displayed, but really make sure that it’s a high quality logo, that it’s not blurred or pixelated, and that it’s not cut off. So you’ll notice with most social media platforms that they crop the profile images in a circle. So, what you want to do, what you want to ask the designer for, is a square version of your logo that has a white background, that’s high quality, and that has enough white space around the logo. It’s always nice if the logo has a bit of breathing room, and that it’s not kind of pushed right against the edges of the profile picture. So, that’s some tips when it comes to your profile picture.
The cover image, on the other hand, can feature various types of images. So you can choose to display your company’s products or services, or a specific marketing campaign that you’re currently running. If you choose to display your company’s products or services, make sure to include your contact details. So remember that people need to know what you’re offering within the first few seconds of landing on your page, and if you choose to do a marketing campaign, make sure you have a clear call to action. It’s always a good idea to consistently update this cover image to keep things fresh and interesting for your audience, and make sure that your design is consistent with your company’s branding. So the main kind of tips when it comes to your cover image is to make sure that the main information that you want to communicate is included on your cover image. Having said that, not including too much information, I would say, pretty much just your website URL, and email, and maybe phone if you’re planning on just focusing on your company’s products or services. If it’s a marketing campaign, as I said, have a clear call to action depending on what you want them to do, and that can then take them to a landing page with more information. So, that’s kind of tip number one around your profile image and cover photo.
Tip number two is to use the correct image sizes on social media. So, this is so important. There’s nothing worse than landing on a page where half the design, including some vital information, is cut off. Always remember that with digital designs, these are displayed at different sizes on different devices. So, over and above things being displayed at different sizes on different devices, each social media platform has their own sizes as well when it comes to posts and things like cover images and profile pictures. So, I’ve included a list of dimensions to maintain the best image quality when it comes to cover photos and profile images. So, for Facebook, you want to stick to 852 x 315 pixels for the cover photo, and interestingly enough, if you have to Google sizes for a cover photo, you’ll get two sizes for Facebook cover photo – you’ll get one for desktop and one for mobile, and what you want to make sure of is that – because obviously, the desktop one will be, I think it’s actually slightly longer, but it’s the same width – but you want to make sure that you then put all your information, any text, within the mobile dimensions, because otherwise that’s going to get cut off when you look on it on mobile. And that’s actually happened to me before. So I now know, when I’m creating a cover photo, even if I made the dimensions for desktop, I still am aware of the mobile dimensions so that I don’t get any information cut off. But I think the safe bet is 852 x 315 pixels, and 180 x 180 pixels for the profile image.
Google Plus is 220 x 1192 pixels for the cover photo and 800 x 800 for the profile image. YouTube is 2560 x 1440 pixels for the cover photo and 800 x 800 for the channel icon. Twitter is 1252 x 626 pixels for the cover photo, 73 x 73 for the profile image, and 1600 x 1200 for the background image – Twitter is the only one with a background image. LinkedIn is 646 x 220 pixels for the banner image and 100 x 60 pixels for the profile image. So that’s a lot of information in a short period of time. If you are on the move while listening to this, we will have all that information in the show notes. So it’s just kind of nice to have, maybe jot it down on a Post-it note and have it nearby for whenever you’re creating those. And when it comes to the actual posts themselves, I usually stick with Instagram size just because then you can post… Instagram is kind of the most restrictive, they’re the ones who will actually cut the image off, whereas you can pretty much post any size on Facebook or any of the other platforms. So, if your accounts are connected, and when you post to Instagram it posts to Facebook as well and things like that, then you basically just need to pay attention to Instagram’s dimensions, which is 1080 x 1080 for a post and 1080 by 1920 pixels for a story. So, if all of this is slightly above your head and you’re not sure what I’m going on about, you can also use Canva. So, Canva, as you know if you’ve listened to my podcast before, is a free software that you can use that consists of a bunch of pre-made templates that you can play around with and add your own flair to, and obviously those templates are all already at the correct sizes, so you don’t need to worry about setting up the sizes yourself in any other platform. So that’s also just a cheat way if you don’t want to do it custom. So the second thing when it comes to social media is to use the correct image sizes.
Thirdly, creative designs in RGB color mode. So, if you’ve listened to my episode all about color theory, you would know that there’s a difference between print colors and digital colors, and RGB is for digital and CMYK is for print. If you want to find out more information about that, definitely listen to that episode. But obviously, with social media, you’re going to only want to use RGB, because social media designs are only going to be displayed on screen.
Fourth, make sure that your designs are visually consistent. Again, this is super, super important when it comes to social media, and it’s ultimately what is going to make your social media branding effective, is if you’re keeping your designs visually consistent. So, you’re looking to establish a strong brand identity through social media, right? And so, you need to make sure that all of your designs are visually cohesive across all platforms. So if you are active across more than one platform, you need to make sure that your designs look the same across all platforms wherever you exist, and the same goes for your cover photos. For example, if you are more active on Instagram.. well, Instagram is not a good example, because there isn’t a cover photo there. But let’s say you’re more active on Facebook than on LinkedIn and you’ve recently started a marketing campaign and you’ve updated your Facebook cover photo but you haven’t updated your LinkedIn cover photo, there’s a discrepancy there. That’s not maintaining consistency. So really making sure that wherever you are active, you’re maintaining brand consistency. And I’ve told this story before, but I put in a lot of effort in my Instagram and trying to make sure that I maintain consistent posts, and I’ve kind of got a set pattern that I stick to. And one of the best compliments I’ve received was from a friend of mine who, we were chatting one day, and she said that when she’s scrolling through Instagram and she comes across one of my posts, before she’s even read it or before she’s even looked who posted it, she knows it’s me, just because I’m using the same colors the whole time, I’m using the same style, and that was so great to hear because if a friend is noticing that, then my other followers, and hopefully my ideal client is noticing that as well. So you really want to make sure that you maintain that brand consistency. And something that can help with this is if you create templates. So wherever you’re creating your social media posts if you are doing it yourself, create templates and stick with those templates. So, it also makes it kind of easier when you sit down to create your posts for the month ahead, you’ve already got a template, you just need to replace the content. So, depending on what you’re changing, if you’re changing colors as well, then you can obviously do that, but create templates in Canva, or even in Photoshop or whatever design software you’re familiar with, and then stick to those and that’s going to really help create a powerful impact.
Number five, is to devote more space to images than to text. So, we know that the brain processes images thousands of times faster than it processes text. Or maybe you didn’t know that, but now you do. It’s also been proven that image-based content, especially photos of people, is proven to generate more retweets, Facebook shares, and other types of engagement than text alone. So the rule of thumb when it comes to social media posts is for the image to not consist of more than 20% of text. So you don’t want your post containing more than 20% of text. And obviously, if you’re sharing a lot of quotes and stuff, there’ll be times when that rule is slightly broken but again, just make sure that there’s a sufficient amount of white space surrounding your text, so that it’s not a post that just consists of crowded text and there’s not enough space around it. And what’s interesting to note is that people are known to share or engage with posts that include photos of people, and my kind of tip when it comes to social media as well is that for every five posts you’re posting, three should be value add, so that can include inspirational quotes or tips and advice, one should be promotional, so promoting your services, get people to book an appointment with you, or whatever other service or products you’re offering at that time, and then one should be personality, so that’s where you can post a photo of yourself, of an activity you’ve been doing that week, of your kids if you’re comfortable with that, of your animals, of your interests, things like that, just to give people an idea of who you are, to add a face to the brand, and to be able to feel like they can relate to you more. So that’s just another tip.
But getting back to the list that I put together on social media design, the sixth thing is to pay attention to how the placement of the profile picture interacts with the cover photo. And this is obviously getting a little bit more in depth and you don’t necessarily need to worry about this too much, especially if you have heeded my advice of just using your logo on a white background with enough white space around it as your profile image, but it is something to think about. So, in terms of composition, don’t let a profile picture overlapping the cover image hide any valuable content. So there are times, I think it’s a Facebook group, I’m not entirely sure, just double check, but there are times where, and on LinkedIn I think as well, where the profile image does kind of overlap the cover image, and obviously, if you’ve included important text in that section, it’s usually the lower left section, then that’s going to get covered and that’s not gonna look great. So make sure that the main content of your cover image is placed along the right hand side. Again, not too close to the side because you don’t want to risk it getting cut off in mobile view, but just making sure that it’s not on the lower left side so that it doesn’t risk getting cut off by the profile image. But as I said, as long as your profile image includes your logo, it shouldn’t clash too much with your cover photo, but then you also don’t need to include your logo in your cover image, because then it’s kind of just unnecessary and might look a bit too much, so you’ve kind of already established your branding in your profile image, so you don’t need to duplicate that on your cover photo.
Tip number seven is to make sure your designs abide by each platform’s rules. So again, you don’t need to worry about this too much because I don’t think any of you are going to be posting anything inappropriate or explicit, but this is particularly important when it comes to paid ads and how much text you’re allowed to include in the images. I know I mentioned earlier that the rule of thumb is not more than 20%, and this is particularly enforced if you are wanting to boost any of your posts, then you really need to be strict about that. But this also covers any copyright images, so make sure that you’re not using any copyrighted images on any of your platforms. Again, if you’re looking to make use of really nice images that you’re allowed to use, head on over to pexels.com or unsplash.com. Those are free image resources so that you don’t need to worry about copyrights. And then obviously not posting anything inappropriate, but as I said, I don’t think any of you would be doing that. But if you are concerned about what you are allowed to do and what you aren’t allowed to do, just be sure to read through the guidelines of each platform. Rather be safe than sorry.
So, the second last tip when it comes to design and social media is to keep the design simple. So use compelling imagery, short copy, and a simple call to action where relevant. Again, less is more. This is kind of the basic rule of thumb whenever it comes to design, especially with social media. There’s always a description area, and I sometimes find that people forget that and they try to include all the information on the actual post itself, where you really don’t need to. You only need to include the absolutely vital information on the actual image, and the rest you can write about in the description that goes along with the image. So, less is more, keep the design simple, and that’s how you’re going to make the most impact.
And lastly, make sure that it is creative and visually engaging. So, have fun with your social media design. The bottom line is that the purpose of your social media page is to engage with your target audience and get them to share your content. So, pages that have appealing content and visuals are much more likely to be shared and therefore increase your engagement. So, yeah, really just have fun with it, be creative, see what works and what doesn’t work, keep looking at your insights, and if there’s a specific style of post that’s working, then duplicate the amount of times that you post that sort of post, and think about including your logo in your designs for sharing purposes. So, I don’t do this personally on my Instagram because I don’t think it looks nice if you’re looking at someone’s feed and their logo is included in each and every one of their posts, but maybe on some of the other platforms like Facebook, it could make sense, because then, when people are sharing it, they’re sharing your logo along with it, or even if you include your website URL as, like, a watermark at the bottom of the post or something like that. It’s something to consider if that post has to go viral, then it’s literally pointing everyone back to your website.
So I hope that’s been helpful. As I mentioned, all of this will be included in the show notes, so you can definitely give it a read if you’ve been busy while listening to this, but have fun with your social media, and if you need help, be sure to get in touch. I’ll see you in the next episode.
Thanks for listening to the Marketing a Practice podcast. If you need help with branding your business, whether it be a new logo, rebrand, or you simply want to have a print flyer designed, head on over to www.practiceofthepractice.com/branding. And if you’d like to see some examples of my design work, be sure to follow me on Instagram @samanthacarvalhodesign. Finally, please subscribe, rate, and review this podcast on iTunes if you like what you’ve heard. Talk to you soon.
This podcast is designed to provide accurate and authoritative information in regard to the subject matter covered. It is given with the understanding that neither the host, the publisher, or the guests are rendering legal, accounting, clinical, or any other professional information. If you want a professional, you should find one.